 Shopfront Developers
How-To: Authenticate your application with Shopfront
We would highly suggest reading through the general authentication information before reading this document.
Shopfront uses OAuth 2.0 for authentication, this guide will walk you through how to authenticate your application.
Getting Started
Before you start developing your integration with Shopfront, you'll have to create an "application" on Shopfront. You can do this from your user account (don't have a user account, sign up now - it's free!), you can have an unlimited amount of applications created in your account.
Once you've opened your user account, simply create a new application by pressing the + NEW button.
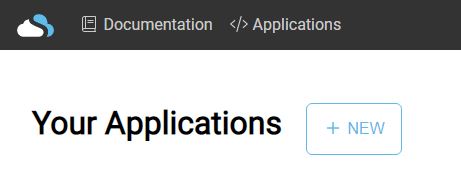
You'll then be presented with a dialog box that requests a Name and a Redirect URI.
The Name field is simply the name of your application, this is visible to user's so make sure they
know it's your application. The Redirect URI is the address to redirect users to once they've approved the
application on Shopfront, typically this is just a normal web address that you control.
Once you've filled in the details, press the Confirm button.
Congratulations! You've now created your application. You'll now need to get two pieces of information,
the client_id and client_secret. These can be retrieved by pressing the Details link next to the application.
Once the details are obtained, you're ready to start writing code.
So, let's pretend that the user whose account you want to authorise has clicked the button, you
then need to redirect them to https://onshopfront.com/oauth/authorize or
https://[vendor].onshopfront.com/oauth/authorize (preferred). When redirecting you need to pass the following as GET
parameters:
client_id: Yourclient_idfrom before,redirect_uri: The URL that you provided when creating the application, the user will be redirected back hereresponse_type: This must equalcode,state: This is a unique "state" for the request that will be passed back to you (useful for preventing a number of different attacks),scope: The required scopes (permissions) for future calls (space separated).
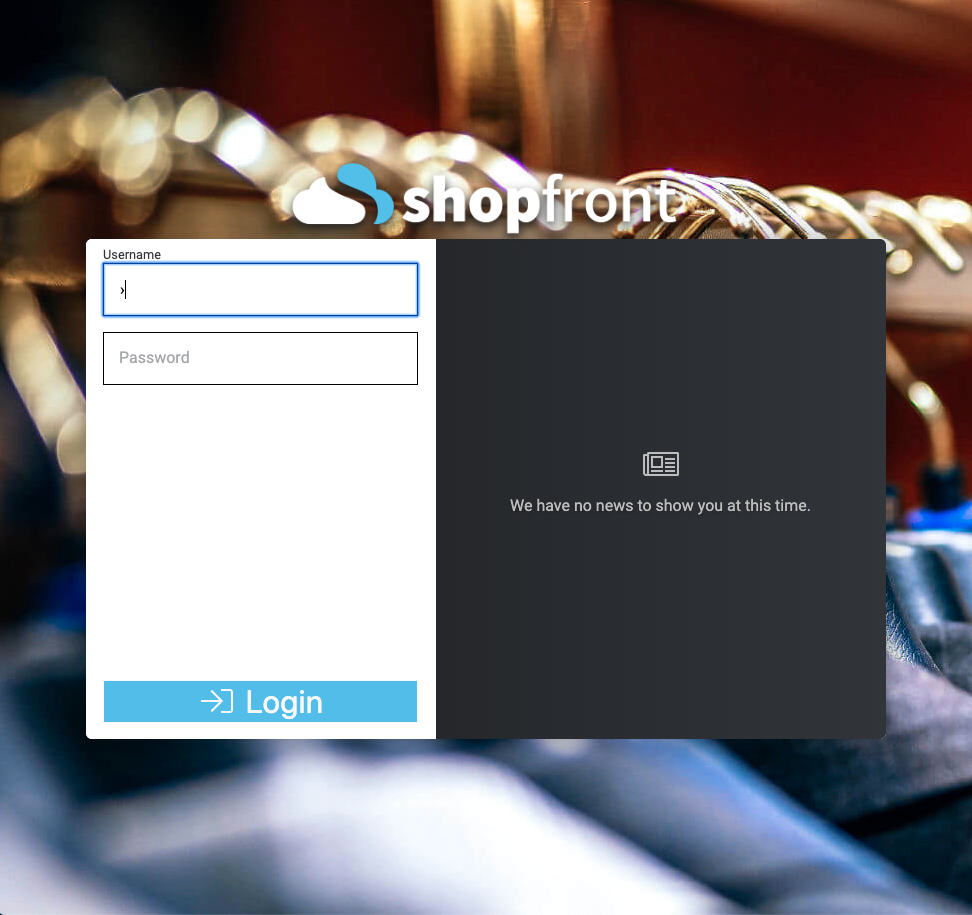
The user may be asked to log in (depending upon how recently they last logged in):
Once the user has logged in they will be presented with the application approval screen and the choice to either approve your application or decline the application:
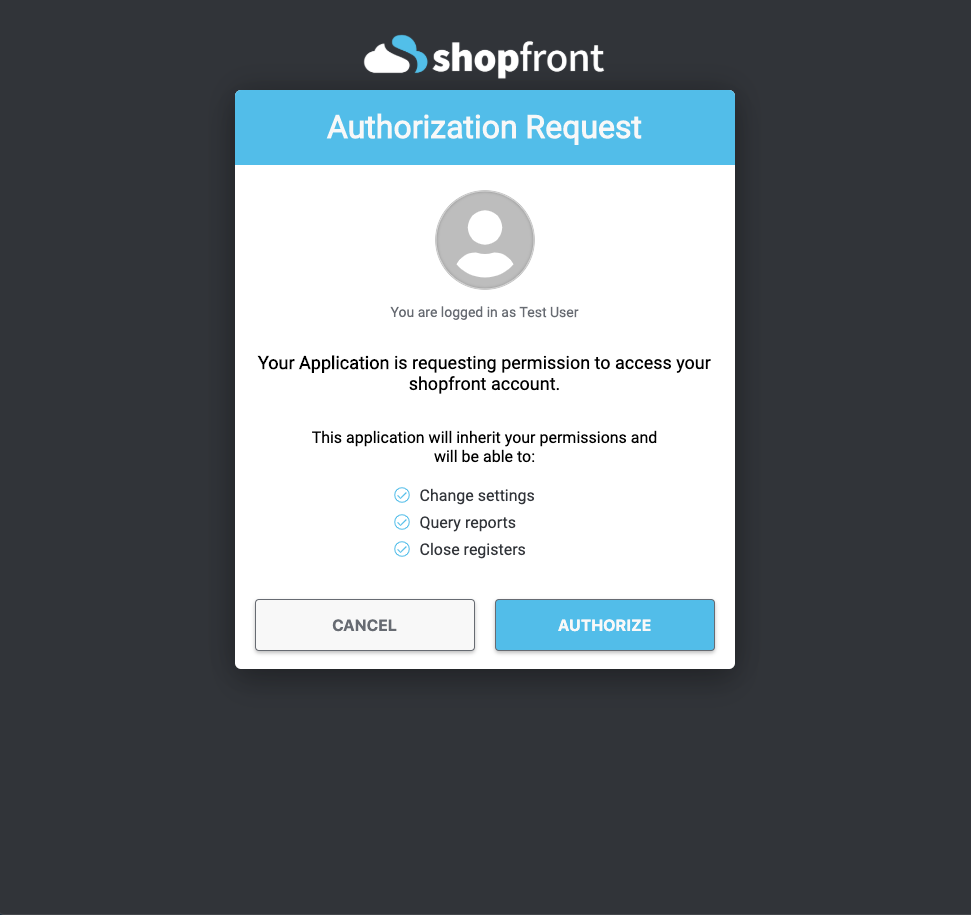
Once the user has made a decision, they will be redirected to your redirect_uri with
the result of their decision.
The request will always contain both a state parameter which matches the original state provided and
a vendor parameter which can be used to determine which store the user was redirect from.
If the user declined the application, you'll receive an error parameter with the reason the
integration was declined.
If the user approves the integration, you'll receive a code parameter which can be used to
obtain an access token.
Presuming the user has approved your integration you can then request an access token from Shopfront.
You can do this by sending a POST request to https://onshopfront.com/oauth/token with the
following fields in a JSON body (don't redirect the user):
client_id: Yourclient_idfrom earlier when you created your application,client_secret: Yourclient_secretfrom earlier when you created your application,redirect_uri: The URL that you provided when creating the application,code: Thecodethat was provided in the previous step,grant_type: This must equalauthorization_code
If all of the information is correct and not too much time has elapsed from the code being
generated (they expire), Shopfront will return a JSON response (with a 200 status code) that
contains the following information:
token_type: The type of token (this will be set toBearer),access_token: The access token you can use to retrieve data in Shopfront with,refresh_token: The token to use to refresh the access token with (this should be stored securely, more later),expires_in: The number of seconds until theaccess_tokenexpires
Once you've received this response you're ready to start querying Shopfront.
Querying Shopfront
Now that you have your bearer token you can start sending requests to any of Shopfront's
APIs by supplying the access_token in the Authorization header, you can see a basic
example that retrieves the current user's information on the right hand side (if you're on
a desktop).
Querying Shopfront
// Continues from previous
const getTokens = (vendor) => {
    if(typeof globalThis.shopfrontTokens[vendor] === "undefined") {
        throw new Error(`Tokens not found for ${vendor}`);
    }

    return globalThis.shopfrontTokens[vendor];
};

const queryShopfront = (vendor) => {
    const tokens = getTokens(vendor);

    return fetch(`https://${vendor}.onshopfront.com/api/v2/graphql`, {
        method : "POST",
        headers: {
            "Content-Type" : "application/json",
            "Accept"       : "application/json",
            "Authorization": `Bearer ${tokens.access_token}`,
        },
        body: JSON.stringify({
            query: `{
                viewer {
                    name
                }
            }`
        }),
    })
        .then(async response => {
            if(response.status !== 200) {
                if(response.status === 429) {
                    // The rate limiter has been hit,
                    // you'll probably want to wait and retry
                    throw new Error("Hit rate limiter");
                } else if(response.status === 401) {
                    let error  = "";
                    const body = await response.json();
                    if(typeof body.data === "string") {
                        error = body.data;
                    } else if(typeof body.data === "object") {
                        error = body.data.error;
                    }

                    if(error === "invalid_token" || error === "Unauthenticated.") {
                        // Refresh the token (next section)
                        return refreshToken(vendor);
                    }
                }

                throw await response.json();
            }

            return response.json();
        })
        .then(body => {
            if(typeof body.errors !== "undefined") {
                throw body.errors;
            }

            console.log(`Successfully integrated as ${body.data.viewer.name}`);
        });
};
// Continues from previous
function getTokens(string $vendor): object {
    $storagePath = "/tmp/shopfrontTokens/" . $vendor;

    if(!file_exists($storagePath)) {
        throw new Exception("Tokens not found for " . $vendor);
    }

    return json_decode(file_get_contents($storagePath));
}

function queryShopfront(string $vendor) {
    $tokens = getTokens($vendor);

    $ch = curl_init("https://" . $vendor . ".onshopfront.com/api/v2/graphql");

    curl_setopt($ch, CURLOPT_POST, true);
    curl_setopt($ch, CURLOPT_RETURNTRANSFER, true);
    curl_setopt($ch, CURLOPT_HTTPHEADER, [
        "Content-Type"  => "application/json",
        "Accept"        => "application/json",
        "Authorization" => "Bearer " . $tokens->access_token,
    ]);

    $query = <<<GRAPHQL
    {
        viewer {
            name
        }
    }
GRAPHQL;

    curl_setopt($ch, CURLOPT_POSTFIELDS, json_encode([
        "query" => $query,
    ]));

    $response    = curl_exec($ch);
    $status_code = curl_getinfo($ch, CURLINFO_HTTP_CODE);

    curl_close($ch);

    try {
        $response = json_decode($response);
    } catch(\Exception $e) {
        // Couldn't decode, this may not be an actual error
    }

    if($status_code !== 200 || isset($response->errors)) {
        if($status_code === 429) {
            // The rate limiter has been hit,
            // you'll probably want to wait and retry
            throw new Exception("Hit rate limiter");
        } else if($status_code === 401 && is_object($response)) {
            $error = "";
            if(is_string($response->data)) {
                $error = $response->data;
            } else if(is_object($response->data)) {
                $error = $response->data->error;
            }

            if($error === "invalid_token" || $error === "Unauthenticated.") {
                // Refresh the token (next section)
                return refreshToken($vendor);
            }
        }

        throw new Exception("Invalid response returned from Shopfront");
    }

    // Query success! Can access the name through $response->data->viewer->name
}
Refreshing Tokens
After an amount of time has elapsed, your access_token will expire (normally about two weeks
after being issued), and you'll need to request a new one (other events can cause your
access_token to expire as well, not just time).
Refresh tokens also expire (normally in about 30 days after being issued)! Make sure you've refreshed your token before this time elapses otherwise you'll need to reintegrate your application again.
Refreshing an access token is a fairly simple process, we'd suggest you build a way of refreshing tokens into your queries rather than waiting for the time to elapse as it's much more future-proof and allows you to account for other ways the token could expire.
When you've detected that your access_token needs to be refreshed, send a POST request
to https://onshopfront.com/oauth/token with the following fields in a JSON body:
client_id: Yourclient_idfrom earlier when you created your application,client_secret: Yourclient_secretfrom earlier when you created your application,refresh_token: The currentrefresh_token,grant_type: This must equalrefresh_token
Shopfront wil then respond with the following JSON response (status code 200):
access_token: The access token you can use to retrieve data in Shopfront with,refresh_token: The token to use to refresh the access token with (this should replace the currentrefresh_token),expires_in: The number of seconds until theaccess_tokenexpires
Refreshing Tokens
// Continues from previous
const refreshToken = (vendor) => {
    // Get the tokens
    const oldTokens = getTokens(vendor);

    // Send the request to Shopfront to refresh our access token
    return fetch("https://onshopfront.com/oauth/token", {
        method : "POST",
        headers: {
            "Content-Type": "application/json",
            "Accept"      : "application/json",
        },
        body: JSON.stringify({
            client_id    : process.env.SHOPFRONT_CLIENT_ID,
            client_secret: process.env.SHOPFRONT_CLIENT_SECRET,
            refresh_token: oldTokens.refresh_token,
            grant_type   : "refresh_token",
        }),
    })
        .then(response => {
            if(response.status !== 200) {
                // Invalid refresh token, you'll likely have to reintegrate
                throw new Error("Unable to refresh the access token");
            }

            return response.json();
        })
        .then(body => {
            // Refresh token has been updated, store all of the details
            storeAccessToken(vendor, body);
        });
};
// Continues from previous
function refreshToken(string $vendor) {
    // Get the tokens
    $oldTokens = getTokens($vendor);

    // Send the request to Shopfront and refresh our access token
    $ch = curl_init("https://onshopfront.com/oauth/token");

    curl_setopt($ch, CURLOPT_POST, true);
    curl_setopt($ch, CURLOPT_RETURNTRANSFER, true);
    curl_setopt($ch, CURLOPT_HTTPHEADER, [
        "Content-Type" => "application/json",
        "Accept"       => "application/json",
    ]);
    curl_setopt($ch, CURLOPT_POSTFIELDS, json_encode([
        "client_id"     => env("SHOPFRONT_CLIENT_ID"),
        "client_secret" => env("SHOPFRONT_CLIENT_SECRET"),
        "grant_type"    => "refresh_token",
        "refresh_token" => $oldTokens->refresh_token,
    ]));

    $response    = curl_exec($ch);
    $status_code = curl_getinfo($ch, CURLINFO_HTTP_CODE);

    curl_close($ch);

    if($status_code !== 200) {
        // Invalid refresh token, you'll likely have to reintegrate
        throw new Exception("Unable to refresh the access token");
    }

    // Refresh token has been updated, store all of the details
    storeAccessToken($vendor, json_decode($response));
}
Revoking Your Application
If for some reason you need to revoke your application, you can do so through a GraphQL query (see the Getting Started with GraphQL information to learn about GraphQL).
Send a GraphQL request to the revokeIntegration
mutation and all future requests will be prevented to Shopfront causing the Vendor
to have to reintegrate your application (it will also prevent any Webhooks from
sending and any embedded applications from loading).
Revoking Your Application
// Continues from previous
const revokeShopfront = (vendor) => {
    const tokens = getTokens(vendor);
    return fetch(`https://${vendor}.onshopfront.com/api/v2/graphql`, {
        method : "POST",
        headers: {
            "Content-Type" : "application/json",
            "Accept"       : "application/json",
            "Authorization": `Bearer ${tokens.access_token}`,
        },
        body: JSON.stringify({
            query: `mutation revokeIntegration()`
        }),
    })
        .then(response => {
            if(response.status !== 200) {
                // Handle error
                throw new Error("Invalid response from Shopfront");
            }

            return response.json();
        })
        .then(body => {
            if(typeof body.errors !== "undefined") {
                throw body.errors;
            }

            console.log("Integration successfully revoked");
        });
};
// Continues from previous
function revokeShopfront(string $vendor) {
    $tokens = getTokens($vendor);

    $ch = curl_init("https://" . $vendor . ".onshopfront.com/api/v2/graphql");

    curl_setopt($ch, CURLOPT_POST, true);
    curl_setopt($ch, CURLOPT_RETURNTRANSFER, true);
    curl_setopt($ch, CURLOPT_HTTPHEADER, [
        "Content-Type"  => "application/json",
        "Accept"        => "application/json",
        "Authorization" => "Bearer " . $tokens->access_token,
    ]);
    curl_setopt($ch, CURLOPT_POSTFIELDS, json_encode([
        "query" => "mutation revokeIntegration()",
    ]));

    $response    = curl_exec($ch);
    $status_code = curl_getinfo($ch, CURLINFO_HTTP_CODE);

    curl_close($ch);

    $response = json_decode($response);

    if($status_code !== 200 || isset($response->errors)) {
        // Handle error
        throw new Exception("Invalid response from Shopfront");
    }

    // Integration has been successfully removed
}