 Shopfront Developers
How-To: Integrate your payment gateway with Shopfront
Getting Started
This guide will go over the basics for integrating your payment gateway with Shopfront as a custom payment method.
The integration with Shopfront is served through an HTML page and communicates with
Shopfront using JavaScript (through the
postMessage API).
Your integration will then communicate with your server using whatever language you would like.
There are a number of additional features which Shopfront supports, however aren't available without prior approval from Shopfront. These include:
- Settlements
- Assisted Calculator
If your application uses the Embedded API, you can communicate with it using internal page messages.
Currently, custom payment methods don't require a developer account, in the future it's likely that all custom payment methods will need a developer account.
Communication With Shopfront
const eventMap = new Map();

window.addEventListener("message", event => {
    if(!event.source || event.origin.indexOf(window.parent.location.hostname) === -1) {
        return;
    }

    let data = event.data;
    if(typeof data === "string") {
        data = JSON.parse(data);
    }

    if(!data) {
        return;
    }

    if(!data.type) {
        return;
    }

    eventMap.get(data.type)?.(data.data);
});

const sendMessage = (type, data = {}) => {
    if(typeof window === "undefined") {
        throw new Error("Payment Gateway is unsupported");
    }

    if(typeof window.parent === "undefined") {
        throw new Error("Payment Gateway needs to be in an iFrame to work");
    }

    window.parent.postMessage(JSON.stringify({
        type,
        data,
    }), "*");
};
Setting up the Payment Method
Before you setup the payment method through Shopfront, you need to have an HTML page that is served over HTTPS. This page only needs to be accessible from the device accessing it, it does not need to be publicly available. Through this HTML page you should load a JavaScript script which will act as the integration.
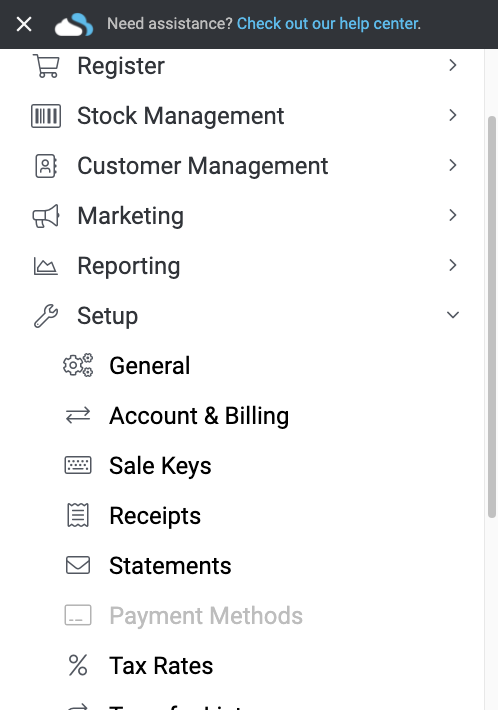
In Shopfront, open the menu, expand Setup and press Payment Methods.
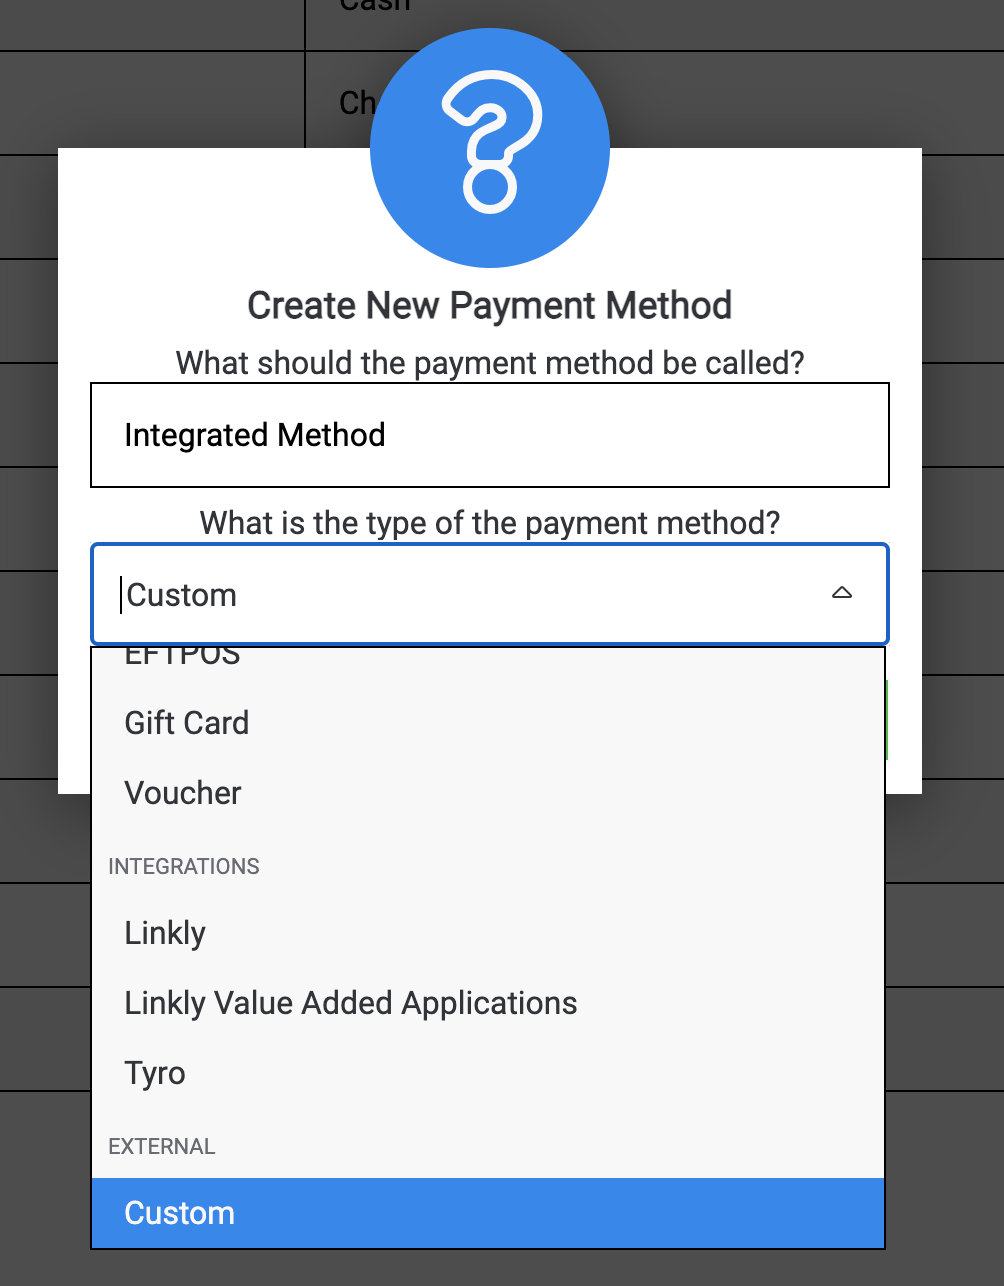
Add a new payment method with the type being set to Custom.
Press the edit button next to the payment method you just created and then enter the address to your HTML page in the Gateway input and then save the payment method.
You'll then want to add the payment method to the register you're using by going to the menu, expand Setup and press Registers & Outlets.
On this page, press the edit button next to the register you wish to use and enable the payment method for the register then save.
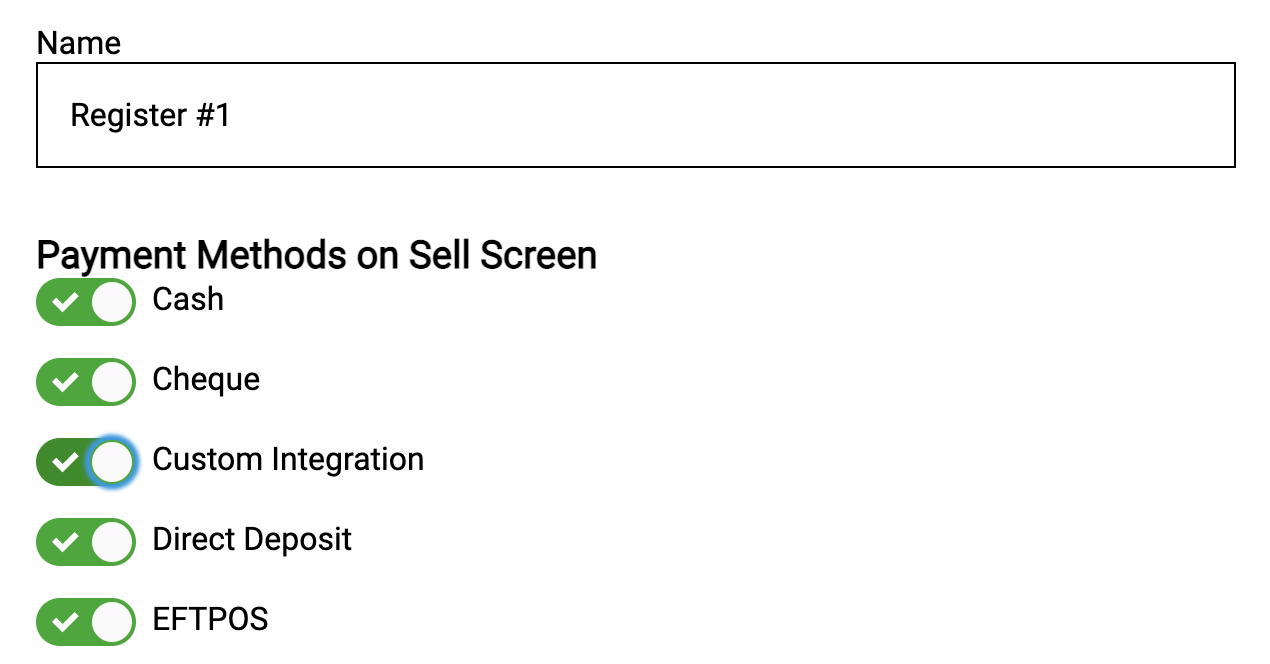
Once enabled, you can head to the sell screen, add a product to the sell screen and attempt to use the payment method.
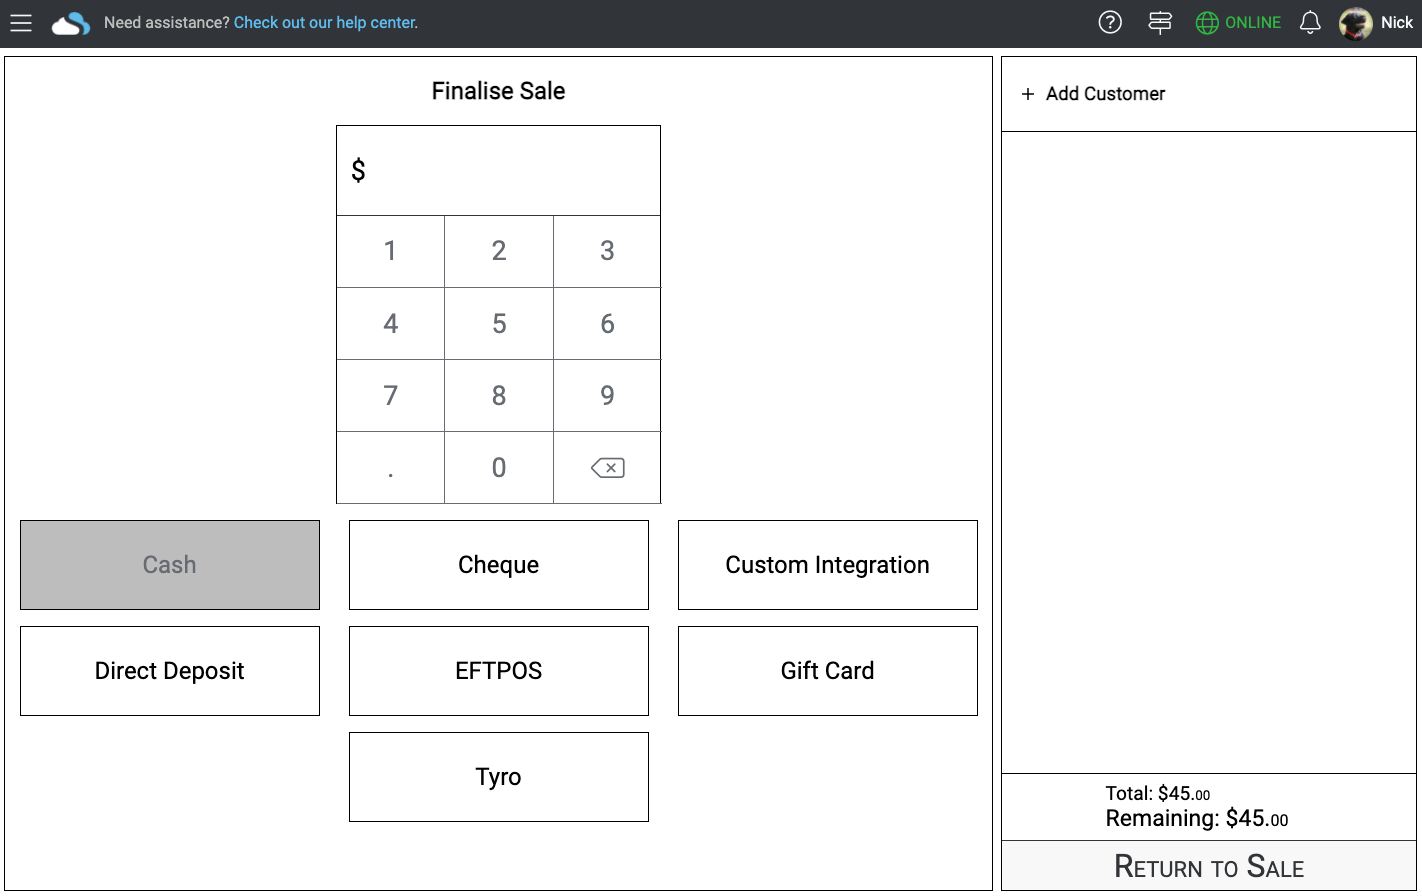
This will attempt to load your HTML page and start communications.
Receiving the data from Shopfront
Once your integration has loaded and is ready to go, you'll need to inform your application is ready
and request the data by sending the REQUEST_DATA event to Shopfront. Shopfront in turn will respond
with a REQUEST_DATA event that contains data such as the amount ot process for the sale, an internal
reference generated by Shopfront and more.
After you've received the data from Shopfront, you should then send the CONNECTED event.
Receiving Payment Data
eventMap.set("REQUEST_DATA", data => {
    // The amount in dollars and cents (always positive)
    const amount = data.amount;

    // The amount to cash out in dollars and cents (always positive)
    const cashout = data.cashout;

    // A string that serves as the reference for the future
    const reference = data.reference;

    // Whether the transaction is a refund or not
    const isRefund = data.refund;

    // Whether this request is being retried or not (see later)
    const isRetry = data.isRetry;

    // Send that we're connected and ready to go
    sendMessage("CONNECTED");

    // You can then use these parameters to process the payment
    processPayment();
});

window.onload = () => {
    sendMessage("REQUEST_DATA");
};
Handling the Payment
After you receive the data to process, you can immediately process the payment. During the processing
you'll need to ensure your application responds to Shopfront's PING requests or Shopfront will believe
your gateway has timed out.
Responding to Pings
eventMap.set("PING", identifier => {
    // Check if we've timed out from the payment gateway
    // or if we're still processing, if we've timed out
    // we should not respond to this, otherwise just send
    // back the identifier.
    sendMessage("PONG", identifier);
});
Once you've processed the transaction, you'll need to send the FINISH event to Shopfront with the status
of the transaction and the amount of money that was processed.
Finishing a Payment
/**
 * Complete the transaction
 * @param {"approved" | "cancelled" | "declined"} status Only `approved` payments reduce the sale's balance
 * @param {number} paymentAmount The amount that was used through the payment method, this can be different to the amount provided by Shopfront
 * @param {number} cashoutAmount The cashout amount that was used through the payment method, this can be different to the amount provided by Shopfront
 * @param {string} subtype The subtype of the payment (e.g. Visa, Mastercard, etc) that was used
 * @param {Record<string, unknown>} metaData Any additional data you would like to include for the payment
 */
const finishPayment = (status, paymentAmount, cashoutAmount, subtype, metaData = {}) => {
    sendMessage("FINISH", {
        status,
        metaData,
        subtype,
        amount : paymentAmount,
        cashout: cashoutAmount,
    });
};
If you receive an error while processing the transaction (which is unreleased to the payment, such as if
you were unable to load a script) you should send an ERROR event to Shopfront before sending the FINISH
event.
Sending Errors to Shopfront
const handleError = (error) => {
    sendMessage("ERROR", error);
    finishPayment("cancelled", paymentAmount, cashoutAmount);
};
Retrying Payments
If Shopfront was unable to confirm if a payment had been completed for some reason (e.g. power outage,
browser closing, etc), Shopfront will automatically reopen the gateway URL and will provide the same
data in the REQUEST_DATA event (with the isRetry parameter set to true).
It's expected that you look up the transaction by the provided reference and provide the result of that transaction instead of reprocessing the transaction.
Retrying Payments
const processPayment = () => {
    if(isRetry) {
        // Replace this with your retry logic
        const payment = lookupTransactionResult(reference);

        if(payment) {
            // If the transaction was found, then send the details back to Shopfront
            finishPayment(payment.status, payment.amount, payment.cashout, payment.metaData);
            return;
        } // If the transaction wasn't found, it's likely it didn't get to your gateway in the first place
    }

    // Process the payment through the normal means
};
Cancelling the Active Payment
If for any reason you need to cancel the currently active payment before processing it, you can send the
FINISH event with the cancelled status. If the payment wasn't successful for any reason (e.g. insufficient
balance) you should send the FINISH event with the declined status.
Cancelling the Active Payment
const cancelPayment = () => {
    sendComplete("cancelled", paymentAmount, cashoutAmount);
};
Printing Receipts
Shopfront supports printing a preformatted text receipt either when the sale has been completed or during the
payment. The preformatted text should be a single string that uses \n for line breaks.
To send a receipt to Shopfront to print you need to send the RECEIPT event with a receiptText parameter
(which contains the actual receipt string) and a print parameter. If print is set to true then the
receipt will print instantly, otherwise it'll be added to the receipts to print at the end of the transaction
(note, there is no guarantee that receipts added to print at the end of the transaction will be printed).
If you need your receipt to print (rather than optionally be included), you should set print to true.
Printing Receipts
const printReceipt = (text, printNow) => {
    sendMessage("RECEIPT", {
        receiptText: text,
        print      : printNow,
    });
};